When it comes to raising Chukar chickens — also known as Chukar partridges — providing a safe, spacious, and species-appropriate aviary is crucial for their health, productivity, and well-being. Whether you’re a hobbyist or a commercial breeder, designing and building a Chukar chicken aviary requires thoughtful planning, attention to detail, and an understanding of these birds’ unique needs. In this comprehensive guide, we’ll walk you through every step of the process, from site selection and materials to construction and essential features. By the end, you’ll be equipped to create an aviary that supports your Chukars’ natural behaviors and ensures their safety year-round.
Understanding Chukar Chickens’ Aviary Needs
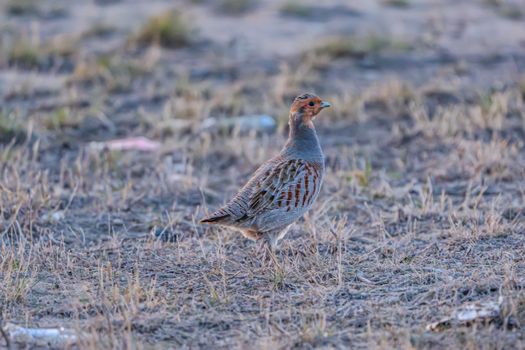
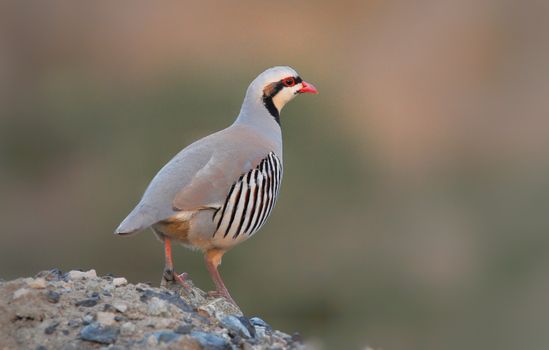
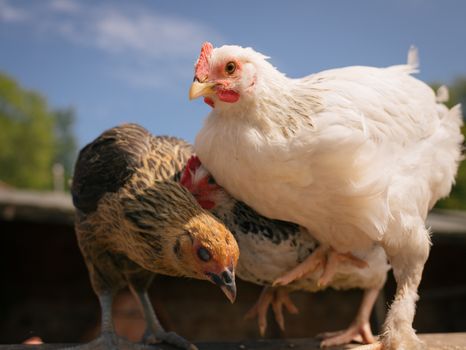
Chukar chickens are ground-dwelling birds native to rugged, rocky habitats of Eurasia, and they thrive in enclosures that mimic their natural environment. Unlike standard chickens, Chukars are agile, can fly short distances, and are more sensitive to stress. A well-designed aviary must provide:
- Sufficient space for movement and flight - Predator-proof security - Protection from harsh weather - Varied terrain and enrichmentChukars require a minimum of 4 square feet per adult bird for optimal health, but many breeders recommend 8-10 square feet to reduce aggression and encourage natural behaviors. They also need dry, well-drained ground as damp conditions increase the risk of disease.
.png)
Choosing the Ideal Location and Layout for Your Aviary
The success of your Chukar aviary starts with the right location. Here are key factors to consider:
- $1 Choose a spot that receives morning sun and afternoon shade. Excessive heat can stress Chukars, while early sunlight helps them stay active and healthy. - $1 Avoid low-lying areas where water collects. Good drainage prevents muddy conditions and reduces disease risk. - $1 Position the aviary near natural windbreaks such as trees, shrubs, or buildings, or plan to install artificial barriers.When planning the layout, balance open space for exercise with sheltered areas for protection. Many aviaries use a rectangular shape, with one end enclosed for shelter and the rest open for foraging and movement.
Selecting the Right Materials for Safety and Longevity
Material selection is critical for the durability and security of your aviary. Here’s what you’ll need:
- $1 Pressure-treated lumber or galvanized steel tubing resists rot and rust. - $1 Bare earth works well if you have well-drained soil. Otherwise, use sand, gravel, or a raised wire floor to promote drainage. - $1 Use 1/2-inch galvanized hardware cloth for the sides and roof. This mesh size keeps out rodents and predators but allows ventilation. - $1 A solid roof (corrugated metal or polycarbonate panels) over at least one-third of the aviary protects against rain, snow, and sun. - $1 Build a secure, predator-proof door with a double-entry (vestibule) system to prevent escapes.Investing in quality materials may cost more upfront but reduces maintenance and replacement costs over time. Below is a comparison of common aviary materials:
| Material | Pros | Cons | Average Lifespan |
|---|---|---|---|
| Pressure-treated lumber | Affordable, easy to work with, resistant to rot | Can warp over time, requires periodic sealing | 10-15 years |
| Galvanized steel tubing | Extremely durable, rust-resistant, low maintenance | More expensive, heavier, harder to modify | 20+ years |
| 1/2-inch hardware cloth | Excellent predator protection, good ventilation | Can rust if not fully galvanized, sharp edges | 10-20 years |
| Chicken wire | Cheap, lightweight | Not predator-proof, easily deformed | 3-5 years |
Step-by-Step Guide to Building Your Chukar Aviary
Now let’s break down the building process:
$1 - Measure your desired aviary footprint. For a small backyard aviary, 10x20 feet (200 sq. ft.) can comfortably house 20-25 Chukars. - Clear vegetation and level the ground. Install a slight slope for drainage. - If predators (foxes, raccoons, snakes) are common, dig a trench 12 inches deep around the perimeter and bury hardware cloth to prevent digging. $1 - Set corner posts (4x4 lumber or steel tubing) in concrete for stability. - Space intermediate posts every 6-8 feet along the perimeter. - Attach horizontal framing at the top and bottom to form a rigid structure. $1 - Stretch 1/2-inch hardware cloth tightly along the sides and roof, securing with heavy-duty staples or wire ties. - Overlap seams by at least 6 inches and fasten securely to prevent gaps. - Cover at least one-third of the roof with solid panels for weather protection. $1 - Install a solid, lockable door with a vestibule or double-door system. - Ensure all hinges and latches are predator-resistant; spring-loaded latches are ideal. $1 - If using natural ground, add a layer of sand or gravel for drainage. - Provide clean, dry bedding such as straw or wood shavings in the sheltered area. - Add logs, rocks, and low platforms to mimic natural terrain and offer enrichment. $1 - Place feeders and waterers under the covered portion to prevent contamination. - Build a simple shelter (wooden box or low shed) at one end for protection from wind, rain, and predators. $1 - Walk the entire perimeter and roof to check for sharp edges, gaps, or weak points. - Test all doors and latches to ensure they’re secure.With careful planning, this process takes 2-4 weekends for most DIYers and costs between $500 and $1,500 depending on the size and materials chosen.
Essential Features and Enrichment for Chukar Well-being
An aviary should be more than just a pen — it’s a habitat. Chukars are active, inquisitive birds that benefit from a stimulating environment. Consider these essential features:
- $1 Chukars keep their feathers clean and parasite-free by dust bathing. Provide a shallow tray of dry sand or fine dirt. - $1 Plant small shrubs or place artificial brush piles for hiding and shade. - $1 Low perches (1-2 feet high) encourage natural roosting behavior but avoid high perches, as Chukars are prone to injury from jumping. - $1 Provide at least one nest box per 4-5 birds, filled with dry grass. - $1 Scatter grains and greens in the litter to encourage natural scratching and pecking.Enrichment reduces stress and aggression, leading to healthier, more productive birds. Studies show that aviaries with varied terrain and enrichment see up to 30% lower rates of feather picking and cannibalism.
Maintenance Tips for a Healthy Aviary
A well-built aviary is a long-term investment, but regular maintenance is essential for your Chukars’ health and safety:
- $1 Remove leftover food, check waterers, and observe birds for signs of illness. - $1 Clean feeders and waterers, replace bedding, and inspect for damage or wear. - $1 Inspect the structure for rust, rot, or wire damage. Repair any holes or weak spots immediately. - $1 Deep clean the interior, treat for external parasites, and check the integrity of the roof and fencing. Adjust shelter and shade as weather changes.Good hygiene and prompt repairs not only prevent disease but also deter predators and extend the life of your aviary.
Final Steps: Introducing Chukar Chickens to Their New Aviary
When your aviary is complete, it’s time to introduce your Chukars. Follow these best practices for a smooth transition:
- Move birds in the morning or evening when temperatures are mild. - Keep them confined to the shelter area for the first 24 hours so they learn its location. - Observe their behavior closely for the first several days. - Gradually introduce new flock members to minimize territorial disputes.Remember, Chukars can be skittish at first. Avoid sudden movements and minimize disturbances. With time, they’ll adapt to their new environment and exhibit natural behaviors like dust bathing, foraging, and socializing.