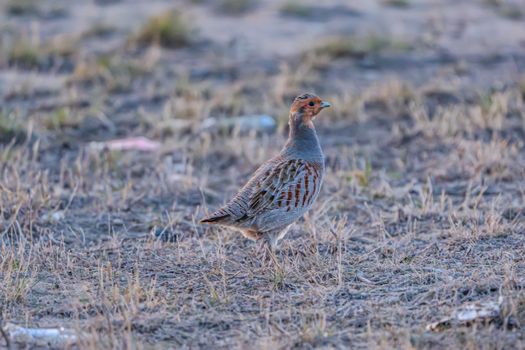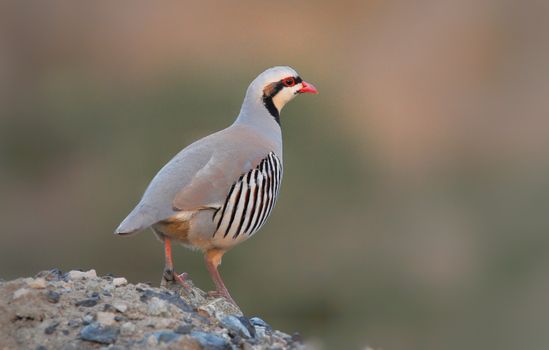
The chukar partridge (Alectoris chukar) has become a popular game bird and farming species across many regions, prized for its adaptability, flavorful meat, and role in wildlife management. If you’re considering incubating and hatching chukar chicks—whether for a small backyard flock or a commercial operation—it’s crucial to understand the detailed process step by step. Successful incubation requires precision, patience, and knowledge of the chukar’s unique needs. In this article, we’ll break down each stage, from selecting fertile eggs to guiding chicks through their first days of life, highlighting best practices and key differences from other game birds.
Understanding Chukar Egg Incubation: The Basics
Incubating chukar eggs is both an art and a science. Unlike chickens or quail, chukars have specific requirements that must be met to ensure healthy, viable chicks. The incubation period for chukar eggs is typically 23 to 24 days, which is slightly longer than for quail (17-18 days) but shorter than for some other game birds.
Key facts: - Ideal incubation temperature: 99.5°F (37.5°C) - Relative humidity: 45-50% for the first 20 days, increasing to 65-70% during the final days (lockdown period) - Turning: Eggs must be turned at least 3 times daily to prevent the embryo from sticking to the shell membraneA successful hatch depends on maintaining these parameters consistently. Even small fluctuations in temperature or humidity can dramatically reduce hatch rates.
.png)
Step 1: Selecting and Preparing Chukar Eggs
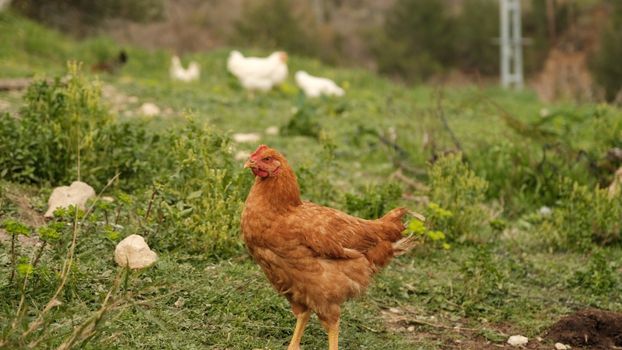
The process begins well before eggs enter the incubator. Choosing high-quality, fertile eggs is the foundation of a successful hatch. Here’s how to get started:
- $1 Only collect eggs from healthy, mature chukar hens and robust males. Eggs should be clean, of normal size and shape, and free from cracks or deformities. Studies show that eggs larger than 16 grams tend to have higher hatch rates. - $1 If eggs are not set immediately, store them at 55-65°F (13-18°C) with 70-80% humidity. Store with the pointed end down, and tilt or turn eggs daily to prevent the yolk from settling. - $1 Avoid washing eggs, as this can remove the natural protective ‘bloom’ that guards against bacteria. Only dry brush off any dirt or debris. - $1 Set eggs within 7 days of laying for optimal hatchability. Hatch rates drop by over 15% after 10 days of storage.Proper handling and storage can mean the difference between a successful hatch and disappointment.
Step 2: Setting Up the Incubator for Chukar Eggs
The next stage is to prepare the incubator. Both forced-air and still-air incubators can be used for chukar eggs, but forced-air models offer more even temperature distribution.
- $1 Warm up the incubator 24 hours before setting the eggs. Check that temperature and humidity controls are working accurately. - $1 Arrange eggs on their sides or with the large end slightly elevated, allowing for easy turning. Do not overcrowd; leave space for air circulation. - $1 If your incubator is manual, mark each egg with an “X” on one side and an “O” on the other to track turning. Automatic turners are recommended for larger batches. - $1 Fill water trays as directed to maintain proper humidity. Monitor levels daily.A digital thermometer and hygrometer are essential tools for monitoring conditions inside the incubator. The most common cause of poor hatch rates is improper temperature or humidity control.
Step 3: The Incubation Period—Monitoring and Adjustments
Incubation is an active process, not a set-and-forget operation. Throughout the 23-24 days, careful attention is needed:
- $1 Turn eggs at least 3 times daily until day 20. This helps prevent the embryo from sticking and encourages proper development. - $1 Keep humidity at 45-50% for the first 20 days. On day 21 (lockdown), increase to 65-70% to soften shells for hatching. - $1 Maintain 99.5°F (37.5°C) consistently. A drop below 97°F (36°C) or above 102°F (39°C) for extended periods can result in failed development or weak chicks. - $1 At day 10 and day 18, candle eggs using a bright light to check for embryo development. Remove any infertile or dead eggs to prevent contamination. - $1 Ensure the incubator has good airflow, especially during the final days of incubation when chicks need more oxygen.Here’s a comparison table of incubation parameters for chukars versus other common game birds:
| Species | Incubation Period (days) | Temperature (°F) | Humidity (%) | Egg Turning |
|---|---|---|---|---|
| Chukar Partridge | 23-24 | 99.5 | 45-50 (first 20d), 65-70 (last 3-4d) | 3+ times/day |
| Quail | 17-18 | 99.5 | 45-55 (first 15d), 65-70 (last 2-3d) | 3+ times/day |
| Pheasant | 23-25 | 99.5 | 53-60 (first 20d), 70-75 (last 3-4d) | 3+ times/day |
| Chicken | 21 | 99.5 | 50-55 (first 18d), 65-70 (last 3d) | 3+ times/day |
This table highlights the subtle but important differences between species. Chukar eggs, for example, require a slightly lower average humidity during the first incubation phase than pheasant eggs.
Step 4: Lockdown and Hatching
The final days of incubation are known as “lockdown.” From day 21 onward, eggs should not be turned or disturbed. Here’s what to expect:
- $1 On day 20, cease all egg turning and remove any turning trays if present. - $1 Increase humidity to 65-70% to prevent chicks from sticking to the shell and to ease the hatching process. - $1 Avoid opening the incubator during hatching, as this can cause dangerous humidity drops, leading to chicks becoming trapped in sticky membranes. - $1 Chukar chicks will begin “pipping” (making the first hole in the shell) on day 22 or 23. Full emergence can take 24 hours or more. - $1 Allow newly hatched chicks to remain in the incubator until they are fully fluffed and dry—usually 6-12 hours.Hatch rates for well-managed chukar incubations typically range from 70-85%. Lower rates may be due to poor egg quality, temperature spikes, or inadequate humidity.
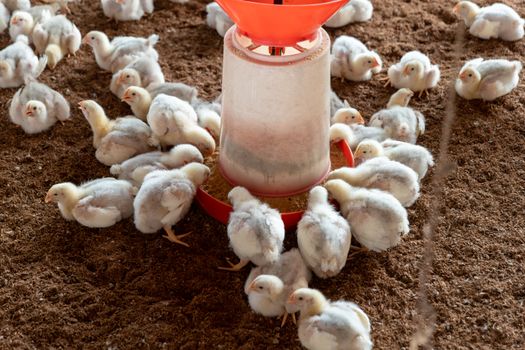
Step 5: Brooding Newly Hatched Chukar Chicks
Once chicks are dry and active, it’s time to transfer them to a brooder. Early care is critical for survival and healthy growth.
- $1 Maintain a temperature of 95°F (35°C) for the first week, reducing by 5°F each week until ambient temperature is reached. - $1 Use paper towels or non-slip mats for the first few days to prevent leg injuries (spraddle leg). Avoid slick surfaces. - $1 Offer a high-protein (24-28%) game bird starter crumble. Water should be clean, fresh, and shallow to prevent drowning. - $1 Provide 0.5 square feet per chick initially, increasing as they grow. - $1 Monitor for signs of chilling, piling, or distress. Healthy chicks are active, alert, and have bright eyes.Proper brooding is often overlooked, but it’s as vital as the incubation process itself. The first week is when most losses occur, often due to chilling, dehydration, or nutritional issues.
Troubleshooting Common Problems in Incubation and Hatching
Even with careful attention, challenges can arise. Being prepared to troubleshoot is essential for maximizing your success:
- $1 Check for temperature fluctuations, improper humidity, or poor egg quality. Candling can help identify fertility and developmental problems. - $1 Usually caused by low humidity during hatch. If necessary, assist only when the chick is clearly unable to finish hatching and is in distress. - $1 Often due to genetic issues, old eggs, or temperature extremes. - $1 Typically linked to brooder temperature that is too low or too high, or inadequate nutrition and water.Keeping detailed records and adjusting procedures based on observations will improve results over time.
Key Takeaways on the Incubation and Hatching Process for Chukar Chicks
Incubating and hatching chukar chicks is a rewarding process that requires careful attention to detail and a clear understanding of the species’ needs. From selecting the right eggs and preparing the incubator to monitoring conditions and brooding new chicks, every step is vital. With optimal temperature, humidity, and handling, hatch rates of 70-85% are achievable, providing a strong start for your chukar flock. By following these step-by-step guidelines, both hobbyists and professionals can experience the satisfaction of raising healthy, vibrant chukar chicks.